This rooting method works on all Samsung Galaxy Alpha models.
Root will not erase internal storage on device, but it’s still strongly recommended to back up all data before rooting.
Note: Rooting voids device’s warranty. Users should proceed at their own risk.
Before we begin:
• The device should have at least 80% charge left on the battery.
• If you have Samsung Kies program in PC, Kies should be completely turned off to not disturb all the process.
• USB drivers must be installed on PC (if Kies are in PC then drivers are already installed).
• USB Debugging must be enabled on the device to transfer files between the phone and PC. To enable it go to Settings/About phone and keep taping on Build number until you see Developer mode has been turned on. After that go to Settings/Developer Options and check USB Debugging.
Tutorial:
1. Download to PC the CF-Auto-Root package with Odin included and extract files to the PC.
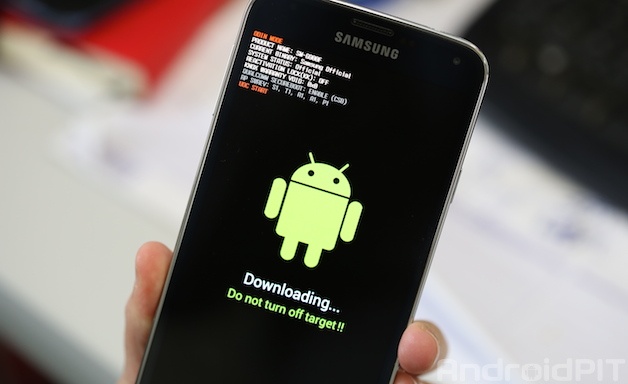
2. Turn off Galaxy Alpha and boot in to Download mode by pressing and holding down the Volume Down, Home and Power buttons together. When a warning screen is displayed release all buttons and press the Volume Up button to enter Download mode. 
3. Run Odin3-v3.10.6.exe as an Administrator and then connect Galaxy Alpha to the PC via USB cable. Message showing Added!! will appear in Odin’s message box, if not, try another USB port. If the issue persists, try reinstalling the USB driver.
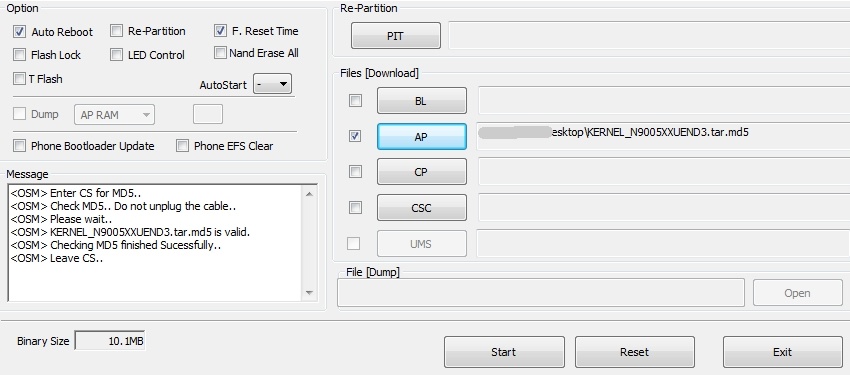
4. Click on the AP button and select the CF-Auto-Root file (a .tar.md5 file), which was extracted in step 1.
5. In Odin, make sure that the Auto Reboot and F. Reset Time options are checked while Re-Partition must stay unchecked. 
6. Click Start button in Odin to begin the flashing process.
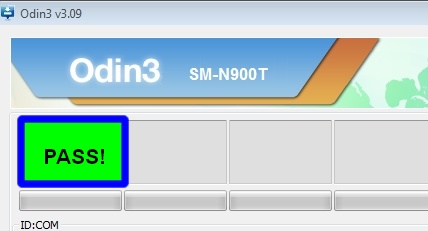
7. After the process is complete, Galaxy Alpha will restart and a PASS message with green background will appear in the left box at the top of Odin. 
8. Turn off Odin and unplug USB cable from device.
Congratulations for successfully rooting Galaxy Alpha!


