In 4th quarter of 2014 Galaxy S3 received last official update – KitKat 4.4.4. Since then, there was no official updates released and never will be. According to Samsung, the phone’s hardware configuration is not capable of receiving further Android support.
Well, CyanogenMod team somehow managed to make it happen! They created CyanogenMod 13 – the latest nonofficial Marshmallow 6.0.1 update for Galaxy S3 i9300.
We are proudly presenting this great news by giving away our tutorial. So go ahead and follow all the steps written below if you want to give another life for your Galaxy S3 i9300.
Warning: This tutorial is only for Galaxy S3 i9300 model.
Update process will erase device internal storage, so it’s strongly recommended to backup your data to device SD memory card or PC before starting this tutorial.
Prerequisites:
- The device should have at least 80% charge left.
- If you have Samsung Kies program in PC, Kies should be completely turned off to not disturb all the process.
- USB drivers must be installed on PC (if Kies are in PC then drivers are already installed).
- USB Debugging must be enabled on the device to transfer files between the phone and computer. To enable it go to Settings/About phone and keep taping on Build number until you see Developer mode has been turned on. After that go to Settings/Developer Options and mark USB Debugging.
Flashing Recovery tutorial (skip it if your device already have one):
- Download ODIN v3.10.7 tool to PC and unzip it.
- Download TWRP 3.0.2 recovery.img.tar to PC.
- Boot Galaxy in Download mode: Turn off the device, then press and hold Volume Down, Home and Power buttons, all at the same time, release the buttons only when the ‘Warning!!’ message appears. Press Volume Up button to confirm that you wish to enter Download Mode.

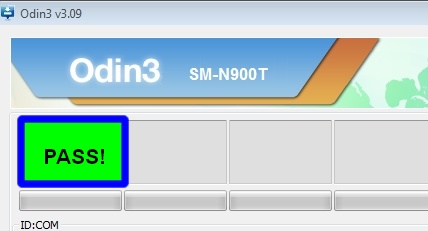
- Launch Odin and connect device via USB cable to your PC. Wait for Odin to recognize it. Blue box should then appear in the program.

In Odin, make sure that the Auto Reboot and F. Reset Time options are checked while Re-Partition must stay unchecked. - Click on the AP button and select TWRP 3.0.2 recovery.img.tar file.
- Click Start button in Odin to begin TWRP recovery flash process.
- After the process is complete, Galaxy S3 will restart and a green PASS message will appear in the left box at the top.

- The phone will restart. First startup can take up to 5 minutes, so be patient.
To boot in to recovery menu: Turn off the device, then press and hold Volume Up + Power + Home button until recovery menu show up.
Update to Marshmallow 6.0.1 tutorial:
- Download cm-13.0-20160413-NIGHTLY-i9300.zip to PC or straight to mobile device.
- Download Google Apps package to PC or straight to mobile device.
- Place both files in to device microSD card storage.
- Now boot Galaxy in to recovery: Turn off the device, then press and hold Volume Up + Power + Home button until recovery menu show up.
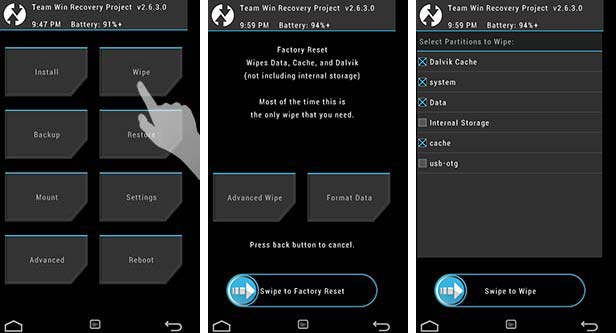
- Make a current software backup, so you will have a recovery file in case if everything goes wrong. Tap on Backup and select all the partitions including System, Data, Boot, Recovery, EFS and swipe right to backup.
- Now tap on Wipe then choose Advanced Wipe and check Dalvik Cache, System, Data, and Cache (don’t select Internal storage).

- Swipe to confirm. Wait for the wiping process to complete.
- Next, go back to TWRP main menu and tap Install.
- Locate cm-13.0-20160413-NIGHTLY-i9300.zip file (which was placed in microSD card) and tap on it. Swipe to Install the ROM.
- Once the installation process is complete, go back to TWRP main menu, tap on Install and locate the Google Apps.zip file. Swipe to install the package.
- After process is complete, tap on Reboot.
- The phone will reboot. First startup can take up to 15 minutes, so be patient.
If you have any concerns at startup, boot device back in to recovery menu and tap on Wipe then choose Advanced Wipe and check Dalvik Cache and Cache. Swipe to wipe and reboot Galaxy S3.
Congratulations on successfully updating Galaxy S3 to Marshmallow 6.0.1 (CyanogenMod 13)


